121 | Short List | Push JERK (Behind the Neck) Snatch Grip | JERK (from Chest) | Behind the Neck | Over Head to Quarter Squat | ![](http://wl-log.com/backend/web/images/exercises/Push-Jerk-Behined-the-Neck-Snatch-Grip-Start.jpg) | ![](http://wl-log.com/backend/web/images/exercises/Push-Jerk-Behined-the-Neck-Snatch-Grip-End.jpg) | ![](http://wl-log.com/backend/web/images/exercises/Push JERK (Behind the Neck) Snatch Grip.gif) |
122 | Long List | Push JERK (Behind the Neck) to Half Squat | JERK (from Chest) | from Racks | Over Head to Half Squat | ![](http://wl-log.com/backend/web/images/exercises/Clean-Fixation-No-Squat.jpg) | ![](http://wl-log.com/backend/web/images/exercises/Deep-Half-Squat-Jerk-End.jpg) | ![](http://wl-log.com/backend/web/images/exercises/Clean+Power-Jerk.gif) |
123 | Short List | Push JERK Behind the Neck | JERK (from Chest) | from Racks | Over Head to Quarter Squat | ![](http://wl-log.com/backend/web/images/exercises/Clean-Fixation-No-Squat.jpg) | ![](http://wl-log.com/backend/web/images/exercises/POWER-JERK.jpg) | ![](http://wl-log.com/backend/web/images/exercises/Clean.gif) |
124 | Long List | Push JERK to Half Squat | JERK (from Chest) | from Racks | Over Head to Half Squat | ![](http://wl-log.com/backend/web/images/exercises/Deep-Squat-Jerk-Start.jpg) | ![](http://wl-log.com/backend/web/images/exercises/Deep-Half-Squat-Jerk-End.jpg) | ![](http://wl-log.com/backend/web/images/exercises/Clean+Power-Jerk.gif) |
125 | Short List | Push-Press | JERK (from Chest) | from Racks BB on the Chest | Over Head with Bent Legs/Knees | ![](http://wl-log.com/backend/web/images/exercises/Push-Press-Start-&-Deep.jpg) | ![](http://wl-log.com/backend/web/images/exercises/Push-Press-Drive-&-End.jpg) | ![](http://wl-log.com/backend/web/images/exercises/Nicole-Push-Press+95kg.gif) |
126 | Long List | Push-Press (Behind the Neck) | JERK (from Chest) | from Racks Bar Behind the Neck | Over Head - straight legs | ![](http://wl-log.com/backend/web/images/exercises/Push-Press-Start-&-Deep.jpg) | ![](http://wl-log.com/backend/web/images/exercises/Push-Press-Drive-&-End.jpg) | ![](http://wl-log.com/backend/web/images/exercises/Nicole-Push-Press+95kg.gif) |
127 | Short List | Push-Press (Behind the Neck) + Overhead Squat | COMBINED EXERCISES | from Racks | Over Head to Deep Squat | ![](http://wl-log.com/backend/web/images/exercises/Push-Press-Behind-the-Nekk+OHS-Start.jpg) | ![](http://wl-log.com/backend/web/images/exercises/Push-Press-Behind-the-Nekk+OHS-End.jpg) | ![](http://wl-log.com/backend/web/images/exercises/Push-Press-Behind-the-Nekk+OH-Squat.gif) |
128 | Short List | Push-Press + Snatch Balance + Overhead Squat | COMBINED EXERCISES | From Stands - Behind the Neck | Over Head to Deep Squat | ![](http://wl-log.com/backend/web/images/exercises/Push-Press-Behind-the-Nekk+OHS-Start.jpg) | ![](http://wl-log.com/backend/web/images/exercises/Push-Press-Behind-the-Nekk+OHS-End.jpg) | ![](http://wl-log.com/backend/web/images/exercises/Push-Press-Behind-the-Nekk+OH-Squat.gif) |
129 | Short List | Push-Ups | JUMPS & ADDITIONAL EXERCISES | Start in a lying position | Push-Up in a lying position | ![](http://wl-log.com/backend/web/images/exercises/Push-Ups-Start.jpg) | ![](http://wl-log.com/backend/web/images/exercises/Push-Ups-End.jpg) | ![](http://wl-log.com/backend/web/images/exercises/Push-Ups-MOV.gif) |
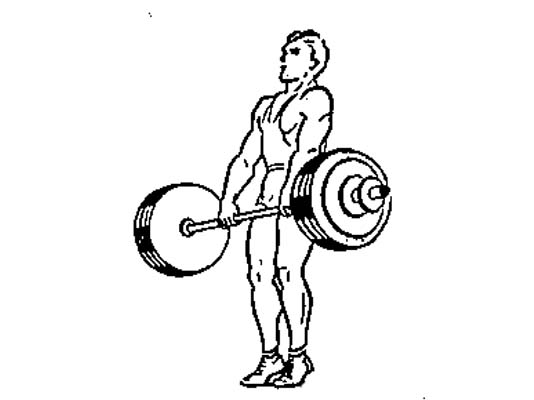
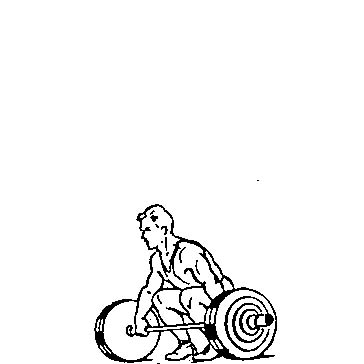
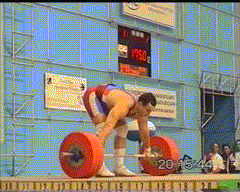
130 | Short List | RDL Romanian Deadlift | PULL | From the Platform (from Hang) | Full Extension | ![](http://wl-log.com/backend/web/images/exercises/Clean-Hang-Start-K-L.jpg) | ![](http://wl-log.com/backend/web/images/exercises/Clean-Pull-End.jpg) | ![](http://wl-log.com/backend/web/images/exercises/Clean.gif) |
131 | Short List | Recovery Sauna Massage Jacuzzi | JUMPS & ADDITIONAL EXERCISES | Recovery Sauna Massage Jacuzi | Sauna Jacuzzi Massage | ![](http://wl-log.com/backend/web/images/exercises/JACUZZI-31.jpg) | ![](http://wl-log.com/backend/web/images/exercises/download.jpg) | ![](http://wl-log.com/backend/web/images/exercises/sauna-jacuzzi-saint-omer.jpg) |
132 | Short List | Rowing on a Row Machine | JUMPS & ADDITIONAL EXERCISES | Sitting on Row Machine | Pushing Legs and Pulling Arms | ![](http://wl-log.com/backend/web/images/exercises/Rowing Start W.jpg) | ![](http://wl-log.com/backend/web/images/exercises/Rowong Finish W.jpg) | ![](http://wl-log.com/backend/web/images/exercises/Rowing Start & Finish - Action W.jpg) |
133 | Short List | Running | JUMPS & ADDITIONAL EXERCISES | Standing | Running | ![](http://wl-log.com/backend/web/images/exercises/Running icon.jpg) | ![](http://wl-log.com/backend/web/images/exercises/Running icon W.jpg) | ![](http://wl-log.com/backend/web/images/exercises/Running on Tradmil M.jpg) |
134 | Short List | Shoulder PRESS (Sitting on the Bench) | PRESS | Barbel on the chest Level | Overhead on straightened arms | ![](http://wl-log.com/backend/web/images/exercises/Seated-Press-by-Simon Martirosyan-Start.jpg) | ![](http://wl-log.com/backend/web/images/exercises/Seated-Press-by-Simon Martirosyan-End.jpg) | ![](http://wl-log.com/backend/web/images/exercises/Seated-Press-by-Simon Martirosyan-100x5.gif) |
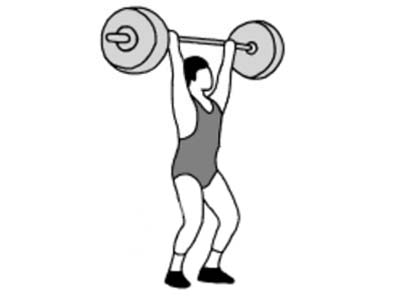
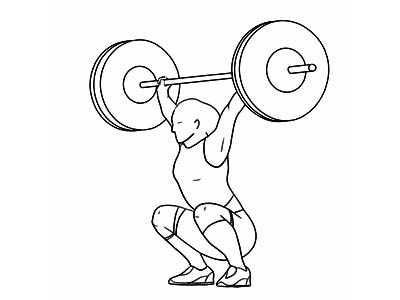
135 | Short List | SNATCH (Classic) | SNATCH | From the Platform | to Deep Squat | ![](http://wl-log.com/backend/web/images/exercises/SNATCH-Start-Platform-1.jpg) | ![](http://wl-log.com/backend/web/images/exercises/SNATCH-END-Deep-Squat-Straps.jpg) | ![](http://wl-log.com/backend/web/images/exercises/Snatch Classical.gif) |
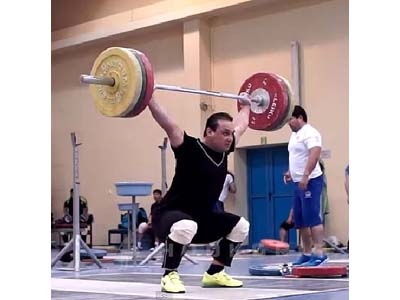
136 | Short List | SNATCH (Competition Lift) | SNATCH | from Platform | Over Head | ![](http://wl-log.com/backend/web/images/exercises/PIC-SN-01.jpg) | ![](http://wl-log.com/backend/web/images/exercises/PIC-SN-12.jpg) | ![](http://wl-log.com/backend/web/images/exercises/Snatch Classical.gif) |
137 | Short List | SNATCH (Deep Squat with Straps) | SNATCH | From the Platform | to Deep Squat | ![](http://wl-log.com/backend/web/images/exercises/SNATCH-START.jpg) | ![](http://wl-log.com/backend/web/images/exercises/SNATCH-FIXATION.jpg) | ![](http://wl-log.com/backend/web/images/exercises/New-SN-Clip.gif) |
138 | Short List | SNATCH (Different Positions) | SNATCH | Various (Platform - Hang) | Various (Deep or Half Squat) | ![](http://wl-log.com/backend/web/images/exercises/SNATCH-Hang-Start-Below-Knees-300x400.jpg) | ![](http://wl-log.com/backend/web/images/exercises/SNATCH-Half-Squat-Fixation-300x400.jpg) | ![](http://wl-log.com/backend/web/images/exercises/SNATCH to Half Squat.gif) |
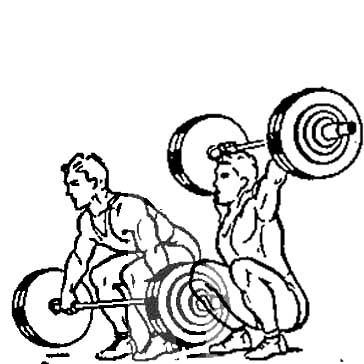
139 | Short List | Snatch + Overhead Squat | COMBINED EXERCISES | From the Platform | Over Head to Deep Squat | ![](http://wl-log.com/backend/web/images/exercises/Snatch-Technique-Pics-01.jpg) | ![](http://wl-log.com/backend/web/images/exercises/Snatch-Technique-Pics-13.jpg) | ![](http://wl-log.com/backend/web/images/exercises/Snatch.gif) |
140 | Short List | Snatch + Push Press | COMBINED EXERCISES | Platform | Overhead | ![](http://wl-log.com/backend/web/images/exercises/Snatch-Start-End.jpg) | ![](http://wl-log.com/backend/web/images/exercises/Start-Half-Squat Snatch.jpg) | ![](http://wl-log.com/backend/web/images/exercises/Snatch-188kg.gif) |