101 | Short List | Split JERK Behind the Neck | JERK (from Chest) | from Racks / Behind the Neck | Split - Over Head | ![](http://wl-log.com/backend/web/images/exercises/Clean-Fixation-No-Squat.jpg) | ![](http://wl-log.com/backend/web/images/exercises/JERK-SPLT.jpg) | ![](http://wl-log.com/backend/web/images/exercises/Clean+Power-Jerk.gif) |
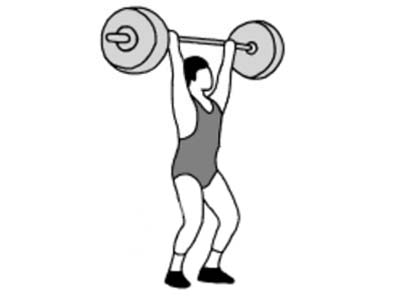
102 | Short List | JERK | JERK (from Chest) | From Racks | Split - Over Head | ![](http://wl-log.com/backend/web/images/exercises/Jerk-Stands-Start-300x400.jpg) | ![](http://wl-log.com/backend/web/images/exercises/Jerk-Stands-Split-300x400.jpg) | ![](http://wl-log.com/backend/web/images/exercises/JERK-Split-Stands-sb29x.gif) |
103 | Short List | Split Push JERK | JERK (from Chest) | with bar on the chest | Over Head | ![](http://wl-log.com/backend/web/images/exercises/SPLIT-Push-JERK-START.jpg) | ![](http://wl-log.com/backend/web/images/exercises/SPLIT-Push-JERK-END.jpg) | ![](http://wl-log.com/backend/web/images/exercises/SPLIT-Push-JERK-1.gif) |
104 | Short List | Power Push-Jerk in Deep Squat | JERK (from Chest) | Deep Front Squat Position | Bar Overhead in Deep Squat Pos | ![](http://wl-log.com/backend/web/images/exercises/Sots-Push-Jerk-Start.jpg) | ![](http://wl-log.com/backend/web/images/exercises/Sots-Push-Jerk-End.jpg) | ![](http://wl-log.com/backend/web/images/exercises/Sots-Power-Push-Jerk.gif) |
105 | Short List | JERK Dip | JERK (from Chest) | from Stands or Rack | Barbell on the Chest | ![](http://wl-log.com/backend/web/images/exercises/JERK-Dip-Start.jpg) | ![](http://wl-log.com/backend/web/images/exercises/JERK-Dip-Drive.jpg) | ![](http://wl-log.com/backend/web/images/exercises/Jerk-Dip-AT.gif) |
106 | Short List | Push JERK Behind the Neck | JERK (from Chest) | from Racks | Over Head to Quarter Squat | ![](http://wl-log.com/backend/web/images/exercises/Clean-Fixation-No-Squat.jpg) | ![](http://wl-log.com/backend/web/images/exercises/POWER-JERK.jpg) | ![](http://wl-log.com/backend/web/images/exercises/Clean.gif) |
107 | Long List | Push JERK (Behind the Neck) to Half Squat | JERK (from Chest) | from Racks | Over Head to Half Squat | ![](http://wl-log.com/backend/web/images/exercises/Clean-Fixation-No-Squat.jpg) | ![](http://wl-log.com/backend/web/images/exercises/Deep-Half-Squat-Jerk-End.jpg) | ![](http://wl-log.com/backend/web/images/exercises/Clean+Power-Jerk.gif) |
108 | Short List | Push-Press | JERK (from Chest) | from Racks BB on the Chest | Over Head with Bent Legs/Knees | ![](http://wl-log.com/backend/web/images/exercises/Push-Press-Start-&-Deep.jpg) | ![](http://wl-log.com/backend/web/images/exercises/Push-Press-Drive-&-End.jpg) | ![](http://wl-log.com/backend/web/images/exercises/Nicole-Push-Press+95kg.gif) |
109 | Short List | JERK from Boxes | JERK (from Chest) | from Boxes | Over Head to Split Jerk | ![](http://wl-log.com/backend/web/images/exercises/Jerk from Boxes - Start.jpg) | ![](http://wl-log.com/backend/web/images/exercises/Jerk from Boxes - Split.jpg) | ![](http://wl-log.com/backend/web/images/exercises/Jerk-from-Boxes-DF.jpg) |
110 | Long List | Push-Press (Behind the Neck) | JERK (from Chest) | from Racks Bar Behind the Neck | Over Head - straight legs | ![](http://wl-log.com/backend/web/images/exercises/Push-Press-Start-&-Deep.jpg) | ![](http://wl-log.com/backend/web/images/exercises/Push-Press-Drive-&-End.jpg) | ![](http://wl-log.com/backend/web/images/exercises/Nicole-Push-Press+95kg.gif) |
111 | Short List | Pause JERK | JERK (from Chest) | with a barbell on the chest | Over Head | ![](http://wl-log.com/backend/web/images/exercises/Dip for Jerk (uater Squat Pos).jpg) | ![](http://wl-log.com/backend/web/images/exercises/Split Jerk.jpg) | ![](http://wl-log.com/backend/web/images/exercises/Pause Split JERK - (Start Dip and Split).jpg) |
112 | Short List | Push JERK (Behind the Neck) Snatch Grip | JERK (from Chest) | Behind the Neck | Over Head to Quarter Squat | ![](http://wl-log.com/backend/web/images/exercises/Push-Jerk-Behined-the-Neck-Snatch-Grip-Start.jpg) | ![](http://wl-log.com/backend/web/images/exercises/Push-Jerk-Behined-the-Neck-Snatch-Grip-End.jpg) | ![](http://wl-log.com/backend/web/images/exercises/Push JERK (Behind the Neck) Snatch Grip.gif) |
113 | Short List | Pause Power JERK | JERK (from Chest) | with a barbell on the chest | Over Head | ![](http://wl-log.com/backend/web/images/exercises/Pouse in DIP Power Jerk.jpg) | ![](http://wl-log.com/backend/web/images/exercises/Dip & Power Jerk.jpg) | ![](http://wl-log.com/backend/web/images/exercises/Power Jerk with Dip (Start Stop & Finish).jpg) |
114 | Short List | JERK with Discs on the Edges of the Bar | JERK (from Chest) | from Chest | Over Head | ![](http://wl-log.com/backend/web/images/exercises/JERK-Start.jpg) | ![](http://wl-log.com/backend/web/images/exercises/JERK-Split.jpg) | ![](http://wl-log.com/backend/web/images/exercises/Split Jerk after Power Jerk - R.jpg) |
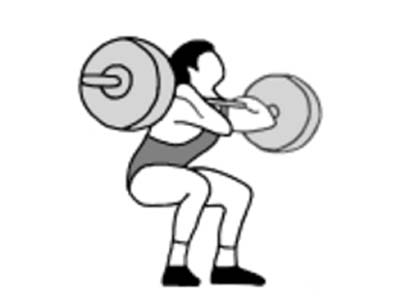
115 | Long List | Squat JERK Behind the Neck | JERK (from Chest) | from Racks | Over Head to Deep Squat | ![](http://wl-log.com/backend/web/images/exercises/Deep-Squat-Jerk-Start.jpg) | ![](http://wl-log.com/backend/web/images/exercises/Deep-Squat-Jerk-End.jpg) | ![](http://wl-log.com/backend/web/images/exercises/Deep-Squat-Jerk-End.jpg) |
116 | Long List | MUSCLE CLEAN from Hang | CLEAN | Below Knee Level | to Chest on the Shoulders | ![](http://wl-log.com/backend/web/images/exercises/Clean-from-Hang.jpg) | ![](http://wl-log.com/backend/web/images/exercises/Clean-Fixation-Half-Squat.jpg) | ![](http://wl-log.com/backend/web/images/exercises/Clean-Fixation-No-Squat.jpg) |
117 | Long List | CLEAN to Half Squat | CLEAN | From the Platform | to Half Squat | ![](http://wl-log.com/backend/web/images/exercises/CLEAN-START.jpg) | ![](http://wl-log.com/backend/web/images/exercises/CLEAN-Half-Squat.jpg) | ![](http://wl-log.com/backend/web/images/exercises/Clean.gif) |
118 | Short List | CLEAN from Blocks | CLEAN | from Blocks - Knee Level | to Deep Squat | ![](http://wl-log.com/backend/web/images/exercises/Clean-Blocks-Start.jpg) | ![](http://wl-log.com/backend/web/images/exercises/Clean-Blocks-Deep-Squat.jpg) | ![](http://wl-log.com/backend/web/images/exercises/Nicole-Clean-Blocks-Crop.gif) |
119 | Short List | Power CLEAN from Blocks | CLEAN | from Blocks - Knee Level | to Quarter Squat | ![](http://wl-log.com/backend/web/images/exercises/Clean-Blocks-Start.jpg) | ![](http://wl-log.com/backend/web/images/exercises/Clean-Blocks-Power.jpg) | ![](http://wl-log.com/backend/web/images/exercises/Nicole-Clean-Blocks-Crop.gif) |
120 | Short List | CLEAN from (Hip) Hang | CLEAN | From Hang | Barbell on Chest | ![](http://wl-log.com/backend/web/images/exercises/Clean-Start-from-Hang.jpg) | ![](http://wl-log.com/backend/web/images/exercises/Clean-Fixation-Deep-Squat.jpg) | ![](http://wl-log.com/backend/web/images/exercises/Clean.gif) |