81 | Short List | Split Push JERK | JERK (from Chest) | with bar on the chest | Over Head | ![](http://wl-log.com/backend/web/images/exercises/SPLIT-Push-JERK-START.jpg) | ![](http://wl-log.com/backend/web/images/exercises/SPLIT-Push-JERK-END.jpg) | ![](http://wl-log.com/backend/web/images/exercises/SPLIT-Push-JERK-1.gif) |
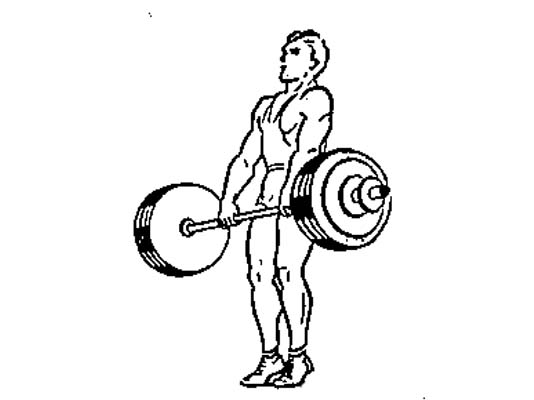
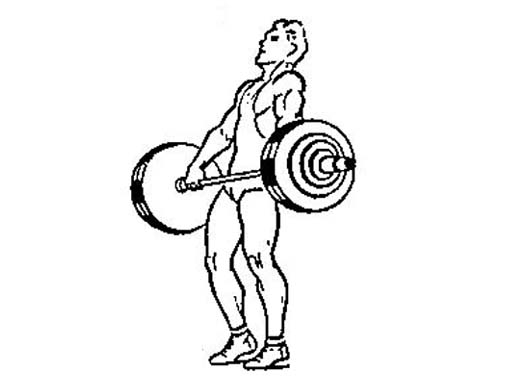
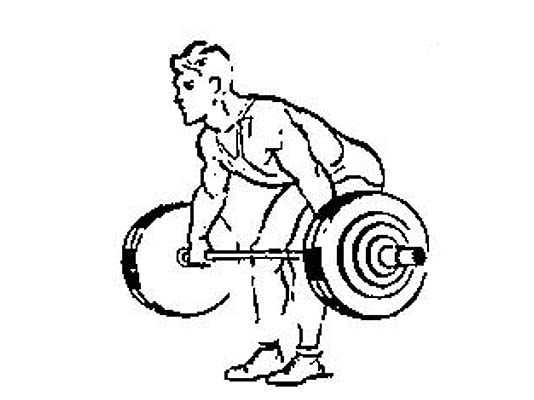
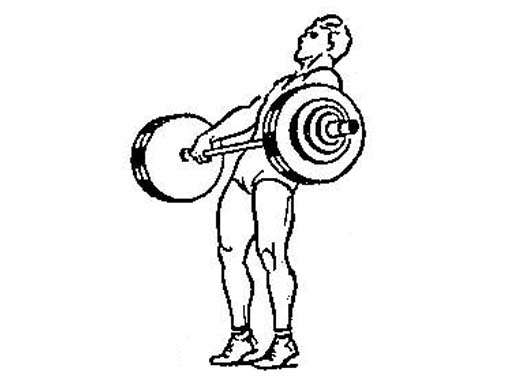
82 | Short List | RDL Romanian Deadlift | PULL | From the Platform (from Hang) | Full Extension | ![](http://wl-log.com/backend/web/images/exercises/Clean-Hang-Start-K-L.jpg) | ![](http://wl-log.com/backend/web/images/exercises/Clean-Pull-End.jpg) | ![](http://wl-log.com/backend/web/images/exercises/Clean.gif) |
83 | Short List | Snatch PULL from Mono-Block | PULL | from the Mono-Block | Straightened Legs | ![](http://wl-log.com/backend/web/images/exercises/SNATCH-from-Mono_Block-START.jpg) | ![](http://wl-log.com/backend/web/images/exercises/SNATCH-from-Mono_Block-PULL.jpg) | ![](http://wl-log.com/backend/web/images/exercises/SNATCH-from_Monoblock.gif) |
84 | Short List | Snatch PULL from Hang | PULL | Below Knee Level | Full Extension | ![](http://wl-log.com/backend/web/images/exercises/Snatch-Technique-Pics-03.jpg) | ![](http://wl-log.com/backend/web/images/exercises/Snatch-Technique-Pics-09.jpg) | ![](http://wl-log.com/backend/web/images/exercises/Sntach-Pull.gif) |
85 | Short List | DEAD LIFT | PULL | From the Platform | end of second pull | ![](http://wl-log.com/backend/web/images/exercises/Clean-Start.jpg) | ![](http://wl-log.com/backend/web/images/exercises/Clean-Start-from-Hang.jpg) | ![](http://wl-log.com/backend/web/images/exercises/CLEAN-PULLS.jpg) |
86 | Short List | Clean PULL | PULL | From the Platform | end of second pull | ![](http://wl-log.com/backend/web/images/exercises/Clean-Start.jpg) | ![](http://wl-log.com/backend/web/images/exercises/Clean-Pull-End.jpg) | ![](http://wl-log.com/backend/web/images/exercises/Clean-PULL-A-T.gif) |
87 | Short List | Snatch Dead PULL | PULL | From the Platform | end of second pull | ![](http://wl-log.com/backend/web/images/exercises/Snatch-Platform-Start.jpg) | ![](http://wl-log.com/backend/web/images/exercises/Snatch-Hang-HIP.jpg) | ![](http://wl-log.com/backend/web/images/exercises/Snatch-Dead-PULL.jpg) |
88 | Short List | Snatch First Pull + Snatch Pull | PULL | From the Platform | Full Extension | ![](http://wl-log.com/backend/web/images/exercises/SNATCH-HANG-START.jpg) | ![](http://wl-log.com/backend/web/images/exercises/Snatch-Pull.jpg) | ![](http://wl-log.com/backend/web/images/exercises/Sntach-Pull.gif) |
89 | Long List | Clean First PULL | PULL | From the Platform | Above the Knee | ![](http://wl-log.com/backend/web/images/exercises/Clean-Start.jpg) | ![](http://wl-log.com/backend/web/images/exercises/Clean-from-Hang.jpg) | ![](http://wl-log.com/backend/web/images/exercises/Clean.gif) |
90 | Short List | Clean PULL from Mono-Block | PULL | from the Mono-Block | Straightened Legs | ![](http://wl-log.com/backend/web/images/exercises/Clean-Blocks-Start.jpg) | ![](http://wl-log.com/backend/web/images/exercises/Clean-Blocks-Deep-Squat.jpg) | ![](http://wl-log.com/backend/web/images/exercises/Nicole-Clean-Blocks-Crop.gif) |
91 | Long List | Clean PULL Standing on a Block | PULL | from the Pedestal | end of second pull | ![](http://wl-log.com/backend/web/images/exercises/PULL-Sart-Pedestal.jpg) | ![](http://wl-log.com/backend/web/images/exercises/CLEAN-PULL.jpg) | ![](http://wl-log.com/backend/web/images/exercises/Sntach-Pull.gif) |
92 | Short List | Snatch PULL | PULL | From the Platform | end of second pull | ![](http://wl-log.com/backend/web/images/exercises/SNATCH-START.jpg) | ![](http://wl-log.com/backend/web/images/exercises/SNATCH-PULL-GEO.jpg) | ![](http://wl-log.com/backend/web/images/exercises/Sntach-Pull.gif) |
93 | Long List | Snatch PULL Standing on a Block | PULL | Standing on Pedestal | end of second pull | ![](http://wl-log.com/backend/web/images/exercises/Sart-Pedestal.jpg) | ![](http://wl-log.com/backend/web/images/exercises/Snatch Pull.jpg) | ![](http://wl-log.com/backend/web/images/exercises/Sntach-Pull.gif) |
94 | Long List | Snatch First PULL | PULL | From the Platform | Above the Knee | ![](http://wl-log.com/backend/web/images/exercises/SNATCH-START.jpg) | ![](http://wl-log.com/backend/web/images/exercises/SNATCH-HANG-START.jpg) | ![](http://wl-log.com/backend/web/images/exercises/Sntach-Pull.gif) |
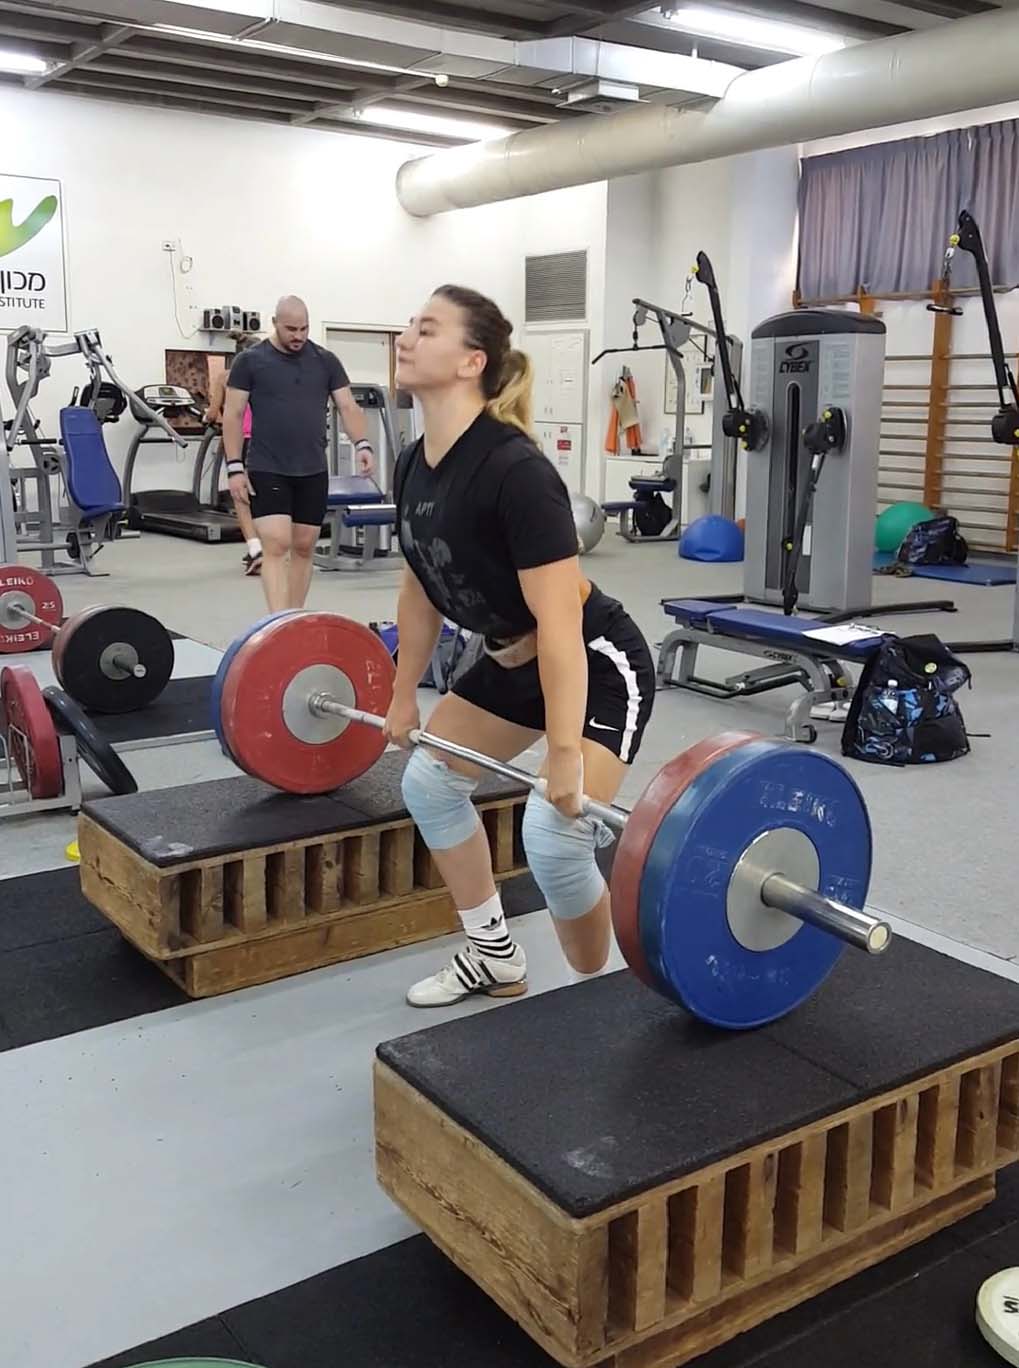
95 | Short List | Snatch PULL from Blocks | PULL | From Blocks | End of second pull | ![](http://wl-log.com/backend/web/images/exercises/Snatch-Hang-Knee.jpg) | ![](http://wl-log.com/backend/web/images/exercises/Snatch-Technique-PULL.jpg) | ![](http://wl-log.com/backend/web/images/exercises/Sntach-Pull.gif) |
96 | Short List | Clean PULL from Hang | PULL | from Hang | End of second pull | ![](http://wl-log.com/backend/web/images/exercises/Clean-Hang-Start-B-K.jpg) | ![](http://wl-log.com/backend/web/images/exercises/Clean-Pull-End.jpg) | ![](http://wl-log.com/backend/web/images/exercises/Clean.gif) |
97 | Short List | Clean PULL from Blocks | PULL | from Blocks | End of second pull | ![](http://wl-log.com/backend/web/images/exercises/Clean-Hang-Start-K-L.jpg) | ![](http://wl-log.com/backend/web/images/exercises/Clean-Pull-End.jpg) | ![](http://wl-log.com/backend/web/images/exercises/Clean.gif) |
98 | Short List | Clean First Pull + Clean Pull | PULL | From the Platform | Full Extension | ![](http://wl-log.com/backend/web/images/exercises/Clean-Hang-Start-K-L.jpg) | ![](http://wl-log.com/backend/web/images/exercises/Clean-Pull-End.jpg) | ![](http://wl-log.com/backend/web/images/exercises/Clean.gif) |
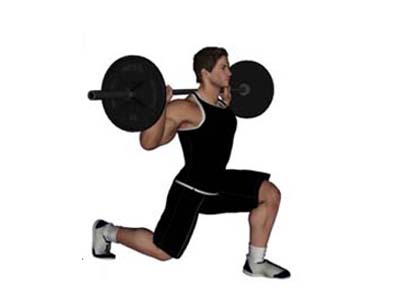
99 | Short List | Back Lunge SQUAT | SQUAT | from Racks | to Deep Squat Position | ![](http://wl-log.com/backend/web/images/exercises/Split-Back-SQUAT-START.jpg) | ![](http://wl-log.com/backend/web/images/exercises/Split-Back-SQUAT-END.jpg) | ![](http://wl-log.com/backend/web/images/exercises/Split-Back-SQUAT.jpg) |
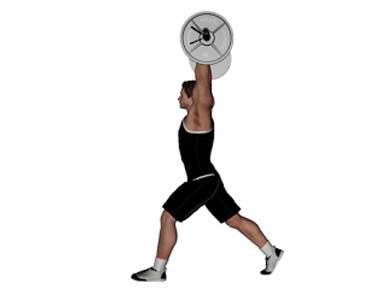
100 | Short List | Overhead Lunge SQUAT (Narrow Grip) | SQUAT | from Racks | to Deep Squat Position | ![](http://wl-log.com/backend/web/images/exercises/Overhead-Split-SQUAT-START.jpg) | ![](http://wl-log.com/backend/web/images/exercises/Overhead-Split-SQUAT-END.jpg) | ![](http://wl-log.com/backend/web/images/exercises/Overhead-Split-SQUAT.jpg) |